

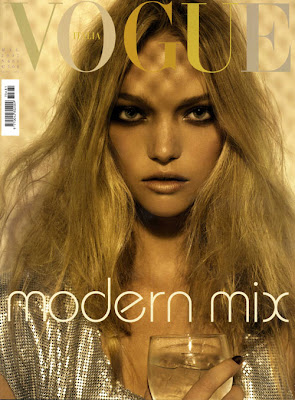
Rosy cheeks.
Red lips.
Dark eyes.
Rough waves.
Discover these and more of fall 2009's top ten beauty trends, straight from the runways.
CLICK LINK BELOW TO SEE THE LOOKS:


MAC Paints are a high tech eye shadow product that comes in a wide variety of shades. It has a creamy texture for easy application but then dries to a smooth, slightly shiny, reflective finish. Paint is a great product to use underneath regular eyeshadows to help them last longer and to prevent creasing. It’s one of my favorite eyeshadow primers I’ve tried. The paints intensify the color of your shadows, making them vibrant and true. Green is really green; blue is really blue.
Paint can be applied with a brush or just with your finger. Be careful not to try to apply to much at a time – A little goes a long way! Alot of people think the paints are messy to apply, but usually you only run into this problem if you have too much paint on your brush, or if you’ve applied to much of it to the eyelid.


1. Always start with the concept. In other words, what do you want your images to communicate? Love, romance, wasting time, spending quality time together, entertainment, domestic work, cooking, on-line communication... If you force yourself to first list the concepts you want to cover, you'll be able to stay on track and use your potential to the max.
2. Make a script. That's crucial. Write down the pictures you have in your mind in a format similar to this: "Man cutting veggies on kitchen counter with woman giving him a surprise hug. Both smiling. Shallow DOF, focus on man." Writing things down will not only force you to be clearer about your ideas, but will also help you track where and what you may be missing. Make sure your list is as detailed as possible, while also preserving a natural flow of poses. Make it in sections and don't put together the kitchen shots with the ones from the garden... ;)
3. Think of the props. Yes, you do need that, and if you want good looking images, you'll have to go to the grocery store and buy some basic stuff (ie. stuff you'll be chopping in the kitchen; popcorn and drinks for the movies, etc.). If you're using stuff you already have, make sure they're in a nice condition and clean of dust, hairs and other dirt, which will be noticeable at 100% zoom of your final image. Mind the clothing in the context of your concept for the image.
4. Think time. Consider the setup you'll need for each of the shots and how long it will take you to move/change it around for the next. How long will it take for the models to change clothing (and makeup if needed)? Take an approximate higher value in mind as you plan the total time for the session. Allow for short breaks.
5. Be flexible and learn to follow the mood. The list/script is there to keep you within a margin, not limit you in your creativity as it emerges during the session or constrain your models in regard to what ideas they may get during the session. This is why, the better you know your script, the more freedom you'll have to work both with it and the people/environment around you.
If you want to create something you can use then you just won't be able to get far without planning at all. Spend some time reading or watching what the pros have already shared on the Internet about their procedures and you'll soon realize how much of it is playing a part in their creative activity. I've started doing this seriously as of recently and I'm finding it quite liberating. It doesn't just save you time, but also makes you much more efficient. Aside from the experience, I believe that planning is the main reason why for beginning photographers, makeup artists, stylist, you name it an hour of work translates in a mere 5-10 good shots. While an hour of shooting will result in at least three/four times, if not even more quality images, when a so-called "pro" is behind the camera.
Lastly, here's an exercise for you: As you look at images, try to analyze them in detail and think of what it must have taken the creator to achieve this (w/o counting the post-processing work). It is also true that professional artists are not just one person... it's more like a whole team of people. Yet, don't let this discourage you. One person with a plan can achieve far more than one person without a plan. :)


 Posts
All Comments


